Computer Platform Requirements
ClockReportsXE software requires a Windows Operating System environment. The following operating systems running a desktop environment are know to be supported:-
- Windows 10
- Windows 8 / 8.1
- Windows 7
- Windows Vista
- Windows XP
- Windows Server 2003 Upwards
Note on server setups: The software cannot be run in a console window, only a desktop environment.
The memory and hard-drive requirements are less critical but we would recommend the following:-
- 4G RAM upwards
- 500Gb Hard drive upwards
The software will also need and Internet connection to function correctly. You must provide permission through your network and firewalls to access https://wwwclockreports.com for the following reasons...
- Adding a Hardware Device and obtaining a product unlock key
- Registering and Activating the software on the computer
- Checking Subscription status, usually done at start up and randomly whilst the software is in use
First Time Install vs Update Install
For first time installations you must download and install the FULL version of the software which will overwrite any previous versions with a blank database and default settings.
The latest FULL version can be downloaded here.
For updating previous installs please download the UPDATE version which doesn't overwrite your current database and settings!
The latest UPDATE version can be downloaded here.
-
LICENSE TERMS: The installation process will require you to agree to our terms and conditions of install and our GDPR statements. You must agree to these terms to proceed with the installation.
-
PAXTON ACCESS CONTROL: At the end of the installation there is an check box option to install Paxton Access Control drivers, their is no reason to enable this option if you are not interfacing with a Paxton Net2 or similar Paxton system.
First Run

After successful installation you will need to find the ClockReportsXE icon on your computers desktop, double click the icon to launch the software.
Once launched the software will login itself in automatically because there are no operators or an admin login password set yet.
Default Login  # When the password is not set an automatic login will begin after a few seconds.

Username:      # 'Admin' is the default user name.
Password:      # '' none or a blank password is default.
Running in Trial Mode
The software will run in 14 day trial mode to begin with, after this the software will expire if not activated and won't be able to run again until registered and activated.
During trial mode you can choose to test a subscription package which can unlock additional features from within the software. The possible modes of operation are:-
BASIC:      # Normal software without a subscription, standard reports are available.
LITE:       # Subscription to enable simple after midnight working and data exporting.
ADVANCED:   # Subscription to enable shifts, rota scheduling, pay, sophisticated reports etc.
ULTIMATE:   # Subscription to enable Advanced plus Web reporting, emailing and Payroll export etc.
Registration and Activation
To register and activate your software you first must add a compatible hardware time clock device to the software. The devices serial number will be used to verify and activate your software.
Connecting a Hardware Device
ClockReportsXE supports many different time clocks or access control systems from many different manufacturers. The most popular manufacturers devices we support are: Anviz, Bio-Office, ClockReports, Paxton, TrustOne, ZKSoftware, ZKTeco etc.
The software can support multiple devices, but the first device you add to the software will be the only one that is used for software registration process, so make sure you the device you are first adding is the one you have a valid registration key for!
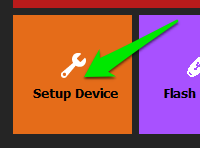
To open the device setup window click the device button found on the Home screen.
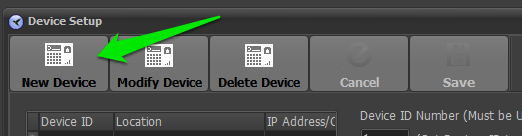
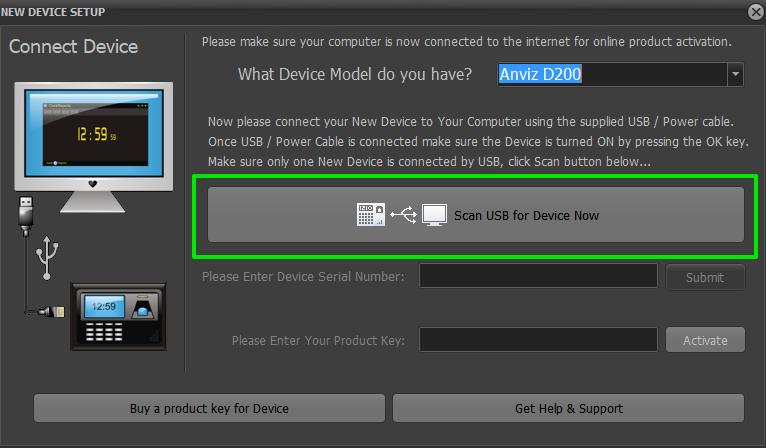
Now on the device setup window click new device button to open the new device window. And in the connect device window click the drop down to select the make / model of time clock you have.
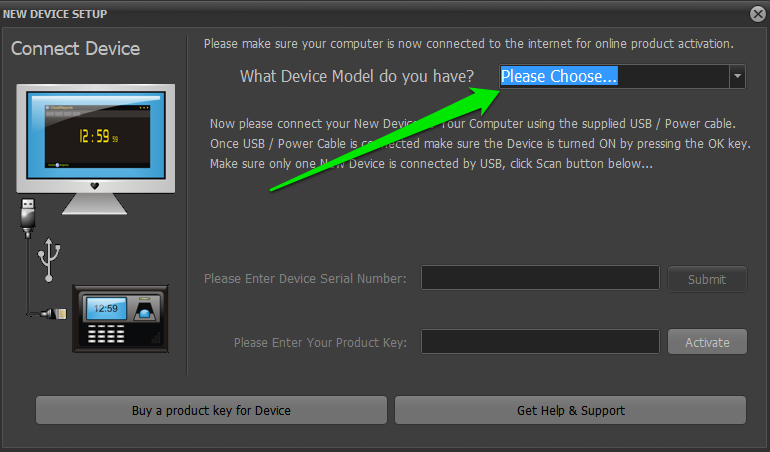
If your device comes with a USB cable then you will be asked to plug it in, and then click the button to scan for the device, to complete the software setup and configure the hardware automatically. Typical Devices that support USB setup are Anviz models D200, EP300, A300, C2, C3, OC500, C2C, VF30, VP30, T5-Pro etc...
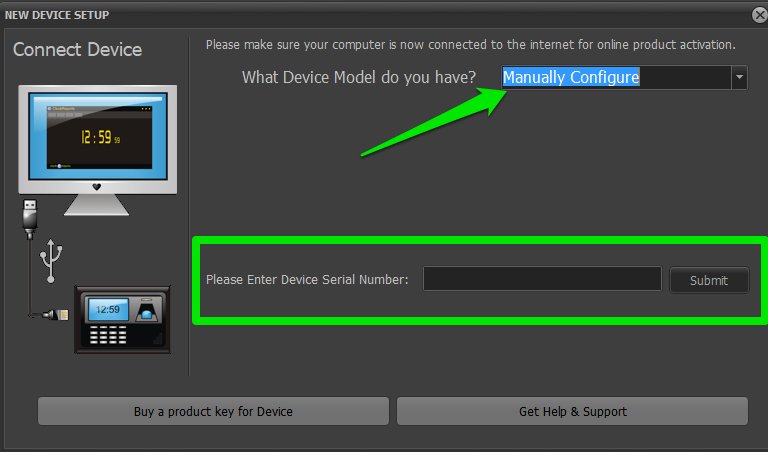
If your device cannot be set up with a USB cable then you can select the correct model and enter the serial number manually and click the submit button. If your cannot find your device in the drop down list you should select the last option in the drop down to configure your device manually and enter your devices serial number.
If all goes well then your device will be accepted and you will proceed to the software registration and activation window. if device serial number is not authorised to be used with ClockReportsXE software then you will be presented with an error message.
If your device has been purchased from ClockReports.com it will come with a valid product key, if it's been purchased from a device reseller or the Internet then you will have to use the button to buy a product key to use your hardware device with our software.
if you are unsure where your device has been purchased you can use the Get Help button to submit a ticket and we will then be able to advise you.
You can purchase additional Product Activation Keys from here.
Software Registration and Activation
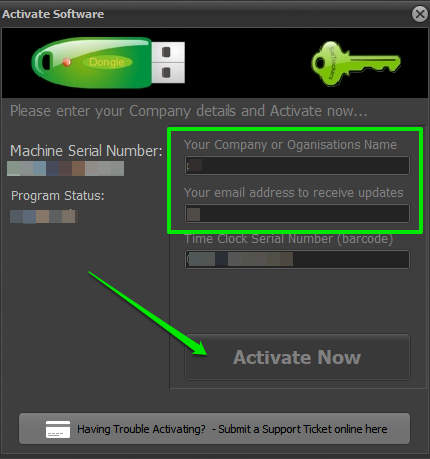
After successfully adding your first device then the software registration screen will open automatically. Alternatively it can be reached from the Help > Activate drop down menu within the ClockReportsXE software screen.
You will need to add your company name and your email address in order to register the software with the Activate button.
Your email address will not be used for marketing or sold to a 3rd party, it sole purpose is to support you with urgent software notifications.
The activation process will obtain your Registration And Activation Key automatically from our online servers. Each computer install or windows account will require it's own activation keys.
The activation keys can only be used once and will expire after they have been used. They therefore cannot be used again, even if you are migrating the software to a new computer, the new computer will need it's own key.
You can purchase additional software activation keys from here.
Configuring Device Communications
To enable the software to sync (download or upload data) from the hardware device you need to configure the software with details about the hardware's configuration. This is done from the setup device window. click the Device Setup button on the home screen to open the setup window.
Click the Modify Device button to start configuring the device connection parameters.

The first thing you should select is the method of connecting to the hardware device the choice is USB cable or your computers Network.
The next step is to choose the type of device you have...
Anviz LCD: This will be model names starting D, E, A, OC, T, C2-PRO etc.
Anviz TFT: This will be model names starting C, OA etc.
Anviz FacePass: This will be model names FACEPASS etc.
ZK TFT: This will be model names such as iClock 500 etc.
ZK LCD: This will be model names such as TF1700 etc.
ClockReports: This will be model names CR300, CR400, CR500 etc.
TSG: This mill be models TSG-250, TSG-550, TSG750 etc.
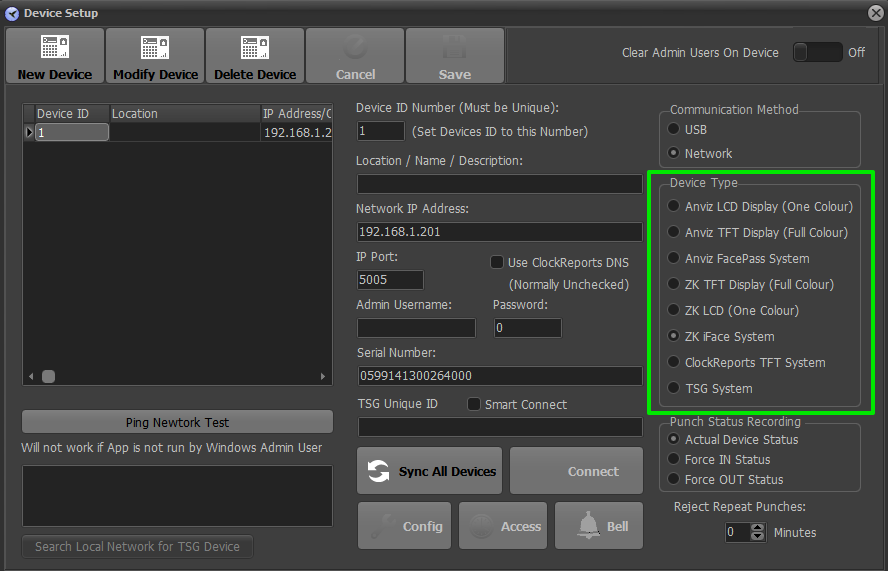
The next step is to configure the IP address and other information required...
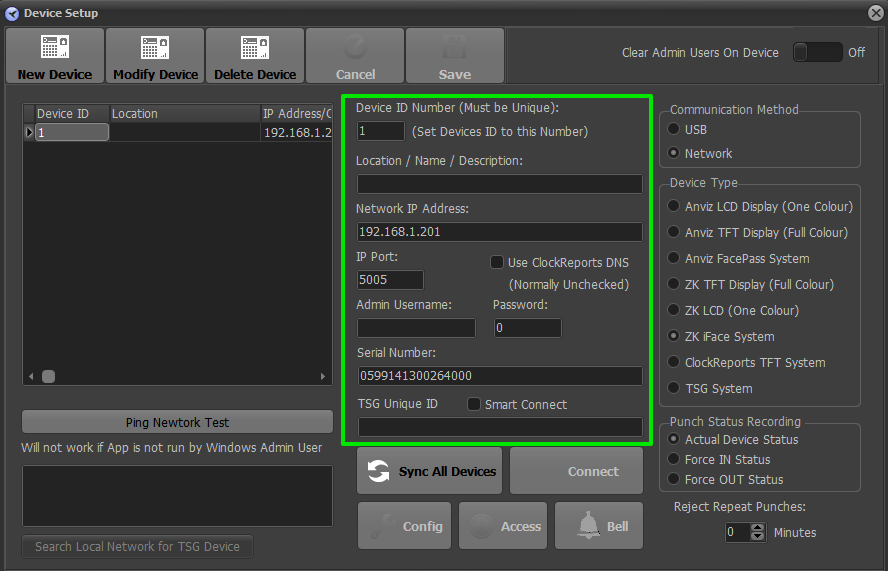
You will need to set these settings correctly!
- Device ID: Must match exactly with the number set in the devices settings, if it's not correct it won't work.
- Location: Can be any description like 'Entrance' or 'Workshop' etc.
- Network IP: Must match the IP address set in the device if its on the local LAN, or the remote sites fixed IP address if the time clock is on a remote site.
-
IP Port: Must match the devices setting.
Default IP ports are...
-
Anviz devices: 5005
-
Anviz Facepass: 33302
-
ZK devices: 4370
-
CR devices: 5005
-
TSG devices: 5005
-
- Use ClockReports DNS: Not normally checked unless you have remote sites without a fixed Internet IP address.
- Admin Username: This is if a communications password is set, normally left blank
- Password: Normally 0
- Serial number: Cannot be changed
- Smart Connect: For TSG devices on remote sites
- TSG Unique ID: From the remote TSG device
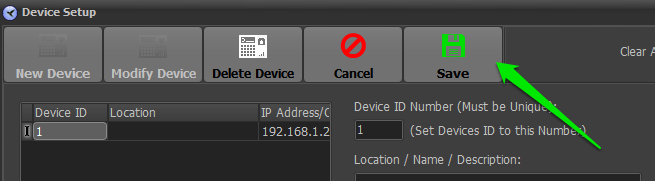
Click the save button to finish saving your settings...